How To Draw Towns On A Fantasy Map
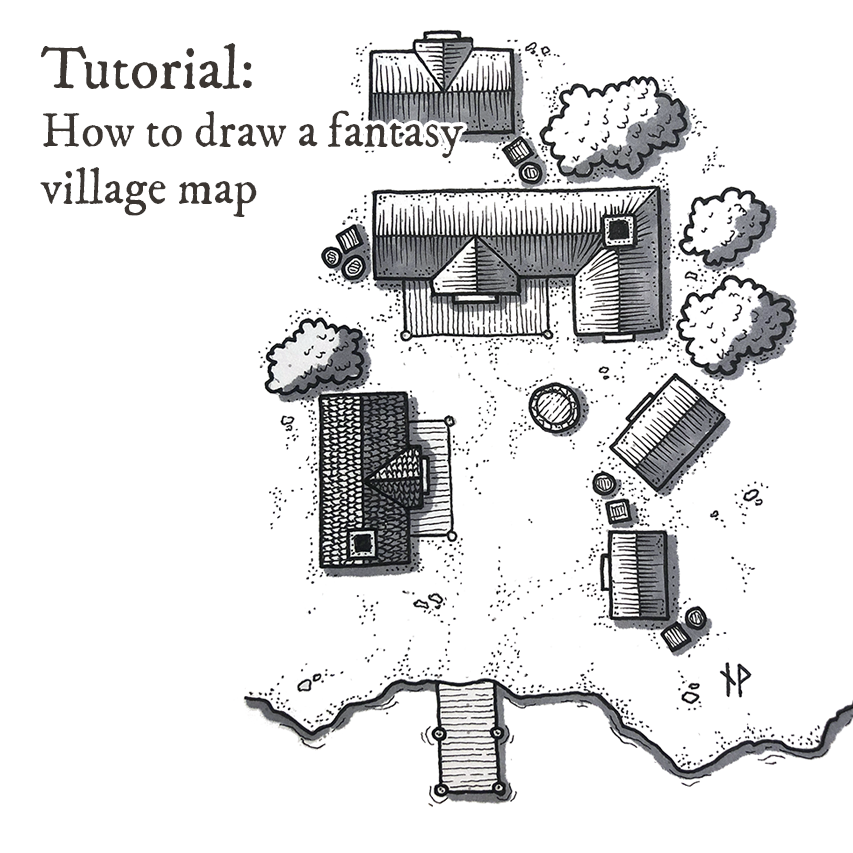
Tutorial: how to draw a fantasy village map
![]()
Update! This and many more tutorials on fantasy and D&D map making is availible also on my website, together with loads of free-to-download maps, check it out — click here!
Villages and towns are important places in most fantasy roleplaying games. It's a place for the adventurers to stock-up on gear before taking off on wilderness or dungeon expeditions, interact with NPC's, and sometimes the village itself is the main stage of the adventure.
Following up on my tutoria l s on how to draw basic dungeons and isometric dungeons, I thought it might be useful with a guide on drawing maps of buildings and settlements.
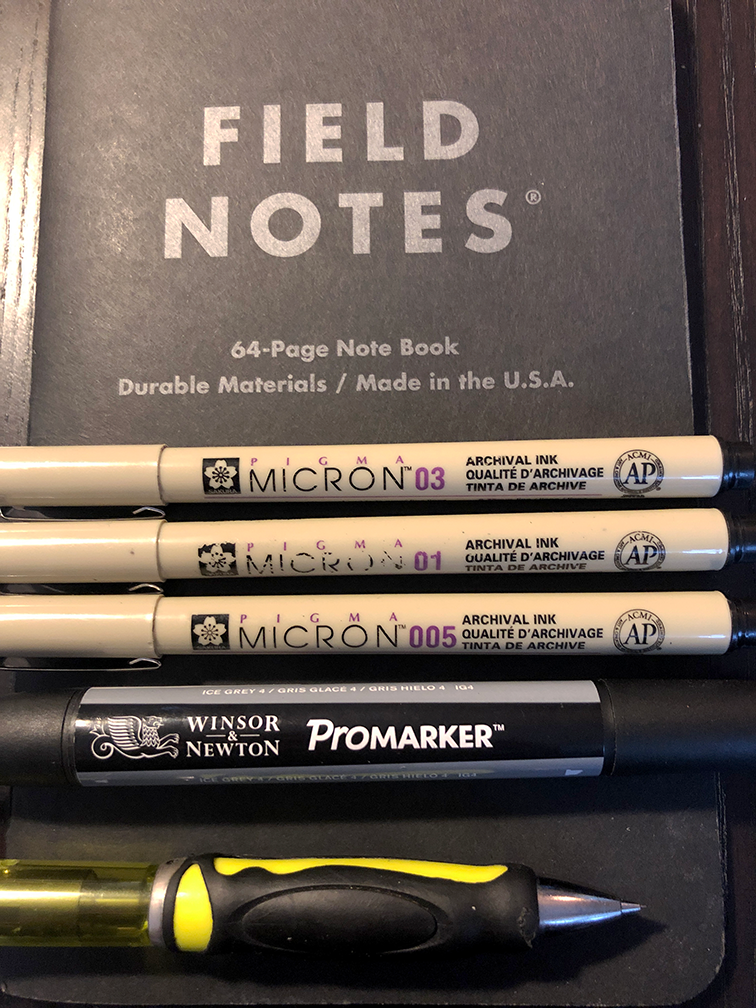
The gear
As always, let's have a look at the tools I will be using for this tutorial:
- Field Notes dot-graph Notebook
- Micron markers (0.05, 0.1 and 0.3)
- Ice Grey 4 Promarker
- Mechanical pen and eraser
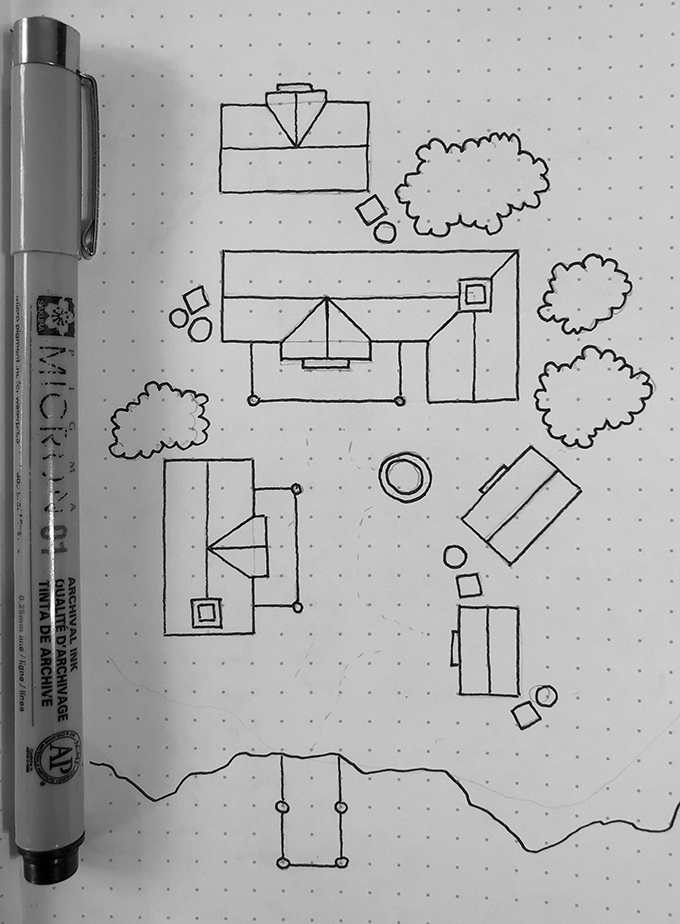
Step one: rough outline
Start by drawing the rough outlines of your village with a mechanical pencil. In this case, I'm just drawing a small cluster of houses, but if you're going for a larger village or town, you might want to put some though into if there should be any main roads, village squares or winding alleys you want to include.
Consider some variation of sizes and shapes, to make it look organic and not too monotonous. A settlement grows over time, and not all buildings will be built the same way and for the same purposes. I also like to throw in some small details, like crates and barrels, foliage or trees.

Step two: ink outline
I use a 0.1 Micron marker to re-draw the outlines. I then erase the lines drawn with the mechanical pen. This will damage the inked outlines slightly, but that's not a problem as we will go over them again in the next step.
Always when drawing maps, you need to think about the balance between making the map easy to understand, and making it realistic or pretty. The doors on my map are obviously exaggerated, but I want to make it clear to whoever is looking at the map where the doors are, since that's critical information (and to be honest, I think it looks fine).
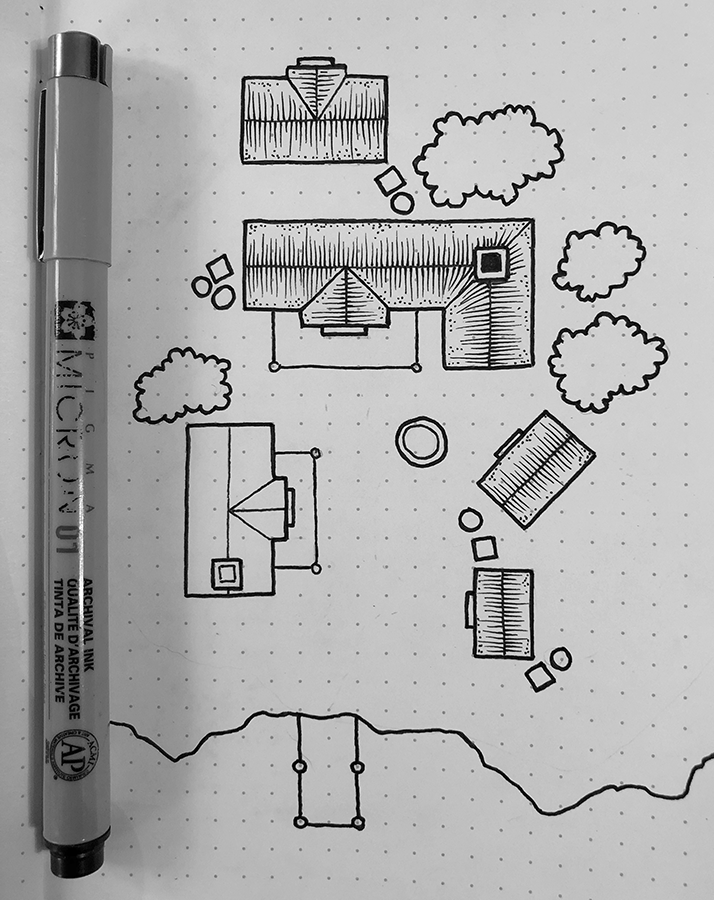
Step three: add weight
For this tutorial, I used a 0.3 Micron marker to add weight to some of the outlines. This provide a good, clear contrast when we start adding finer details in the next few steps.

Step four: add roof details
I use a 0.1 marker to add some texture to the thatched roofs. Start by placing the tip of the pen on the ridge, and then draw a quick line towards the edge of the roof. As you move the pen towards the edge of the roof, apply less pressure to make the line thinner at the end. This might need a little bit of practise, so do that on a separate paper. Alternatively, you can skip this technique and just draw normal lines of varying length — that will also look good.
Step five: more details
With a 0.05 marker, add finer details, such as roof tiles, wood texture to porches, crates and barrels. Also, since this is a lakeside settlement, I add some wavy lines to the coastline.

Step six: texture and rubble
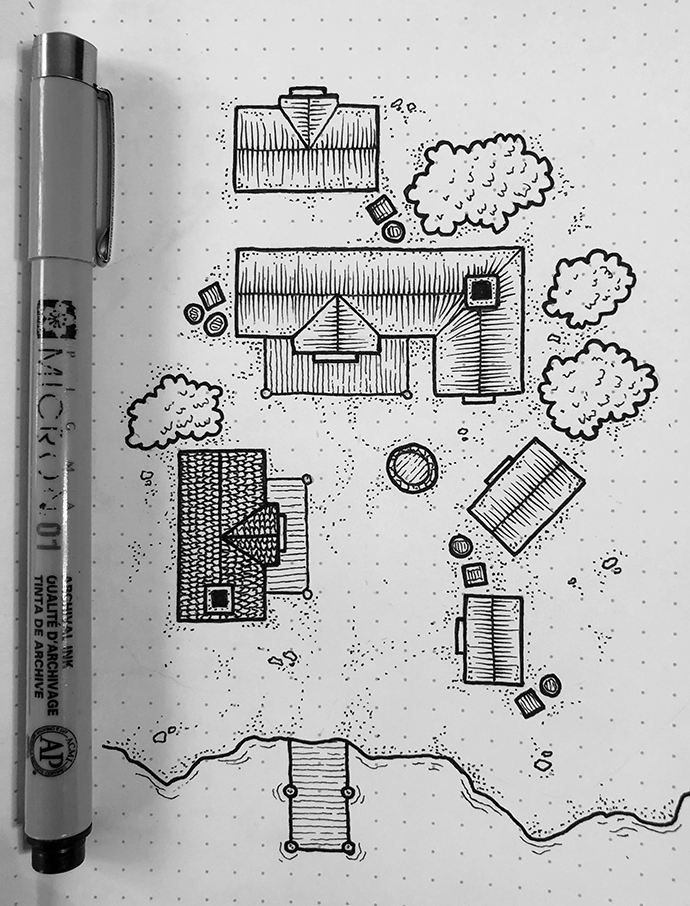
Before moving on to shadows, I add some texture to the ground by drawing stones and dots. Since I want the settlement to look organic, I try to make sure there are as little white space as possible. In hindsight, I could probably have added more texture to this map, but it'll have to do for now — it's super easy to go back and work a bit more on it.
I add some leaves to the trees/foliage to give them volume and texture.
For this step I use a 0.1 marker (and a 0.05 marker for the leaves).
Step seven: shadows
In this step I use my grey Promarker to add shadows to the map. I've decided that the light should come from the top left corner, meaning that roof angles sloping towards the lower and right parts of the map should have shadows (as well as on the ground to the south and east of objects with height (such as buildings, crates and trees).
I also add a shadow to the coastline, to make it pop out more.
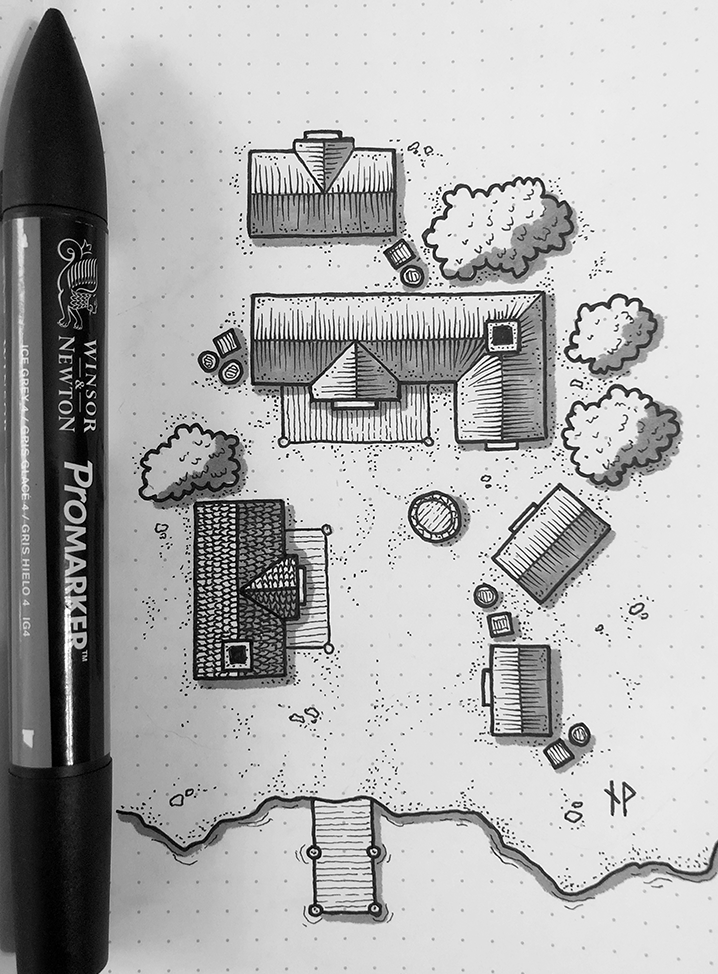
Step eight: clean up
I use Photoshop to work with the levels, and getting the colors right, also removing some of the dots.

And that's it! You have just drawn a map over a small settlement in your campaign world! I hope you enjoyed this tutorial, and found it helpful.
More resources:
I post a lot of my work on my website, at https://www.wistedt.net/. There you can find many maps and other RPG recources that are free to download for personal use.
If you like my maps, please also feel free to follow me on Instagram, where I post more of my work: https://www.instagram.com/paths.peculiar/
How To Draw Towns On A Fantasy Map
Source: https://blog.prototypr.io/tutorial-how-to-draw-a-fantasy-village-map-6d4a4efeaf81
Posted by: solomonstrel1937.blogspot.com

0 Response to "How To Draw Towns On A Fantasy Map"
Post a Comment