How To Draw An Elephant Face Cartoon

I offer to your attention a very interesting drawing lesson — today we will learn how to draw an elephant. We will consider the features of its body structure and learn to create beautiful paintings with the image of one of the most exotic animals on our planet.
Contents
- 1 Materials for Drawing Elephant
- 2 How to Draw an Elephant Step by Step
- 2.1 Shape and Silhouette
- 2.2 Tail
- 2.3 Feet
- 3 Portrait
- 3.1 Head
- 3.2 Ears
- 3.3 Eyes
- 3.4 Trunk and Tusks
- 3.5 Skin and Folds
- 4 Video Tutorial on How to Draw an Elephant Step by Step
Materials for Drawing Elephant
- Paper for sketches
- Graphite pencils of different hardness
- Eraser
This lesson will help to understand the structure of the animal so that you can understand how to draw elephants in any technique. Before you begin serious work, you should practice creating simple sketches.
How to Draw an Elephant Step by Step
When we start painting, we should find good photos and carefully examine them. If you are going to draw an elephant in different poses and motion, it will be useful to watch the video.
You can partially look up to my painting. Maybe, you will get a similar drawing of an elephant at the end of this lesson: 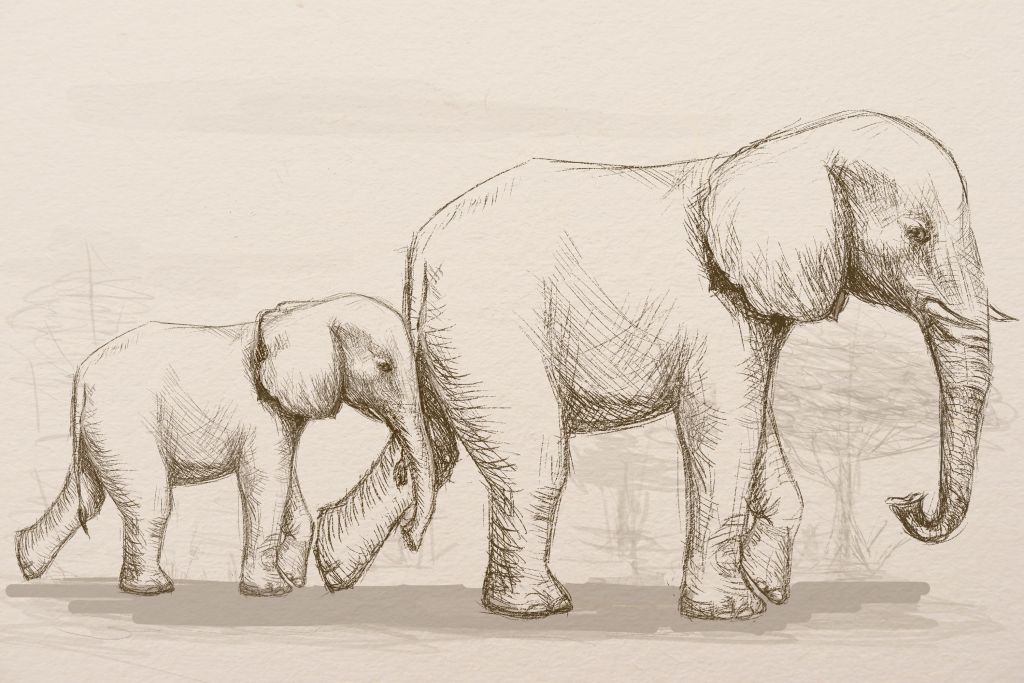
Shape and Silhouette
Let`s create a primitive silhouette. At this stage, we use only the simplest shapes and do not go into the details. All the lines are very light and barely noticeable.
The silhouette created from the simple shapes is shown with a green line. The red arrows show the general direction: from the pelvis up to the chest; the belly sags down between the hind legs and raises near the front legs. Show the head and trunk, body and pelvis, fore and hind limbs.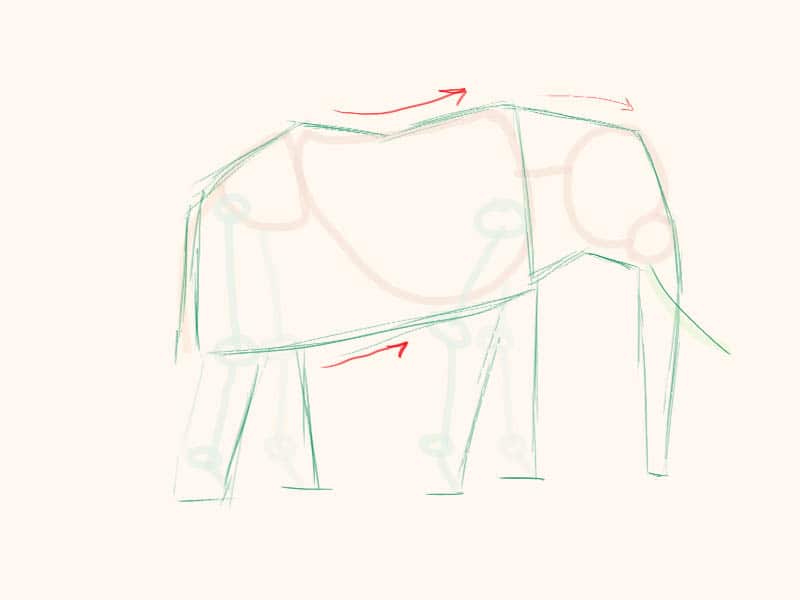
To draw an elephant in motion, you should mark the direction of this motion. You can show this with a line of the spine or an arrow as it is shown in the picture below.
 Bend the legs and improve their thickness. Show the trunk.
Then move on to the more detailed improvement of the figure. Let`s improve the silhouette and make previously marked lines smoother.
Add ears and tusks, following their direction. Let's improve the trunk; the further from the head – the narrower it becomes.
Tail
Draw in a thin tail with a small switch on its tip.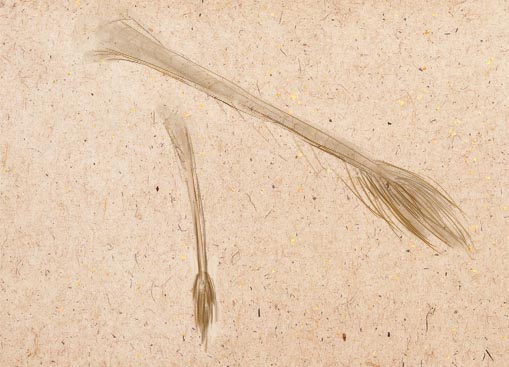
Feet
The feet are shown in the picture below. They deserve special attention. There is a small widening in the area of a foot and the fingers and nails are slightly seen.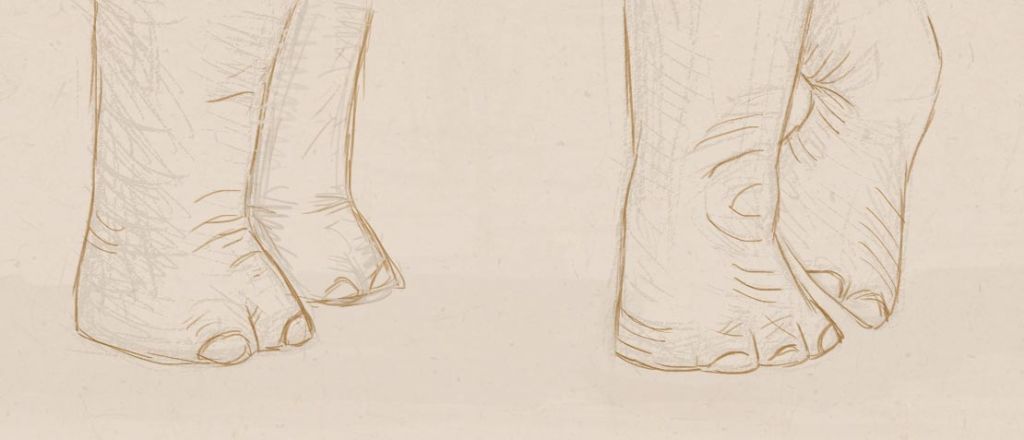 Three nails are seen on the hind legs and four – on the front legs.
Portrait
At the next stage of our lesson on how to draw a realistic elephant, we will try to understand the structure of the head. Here the main distinctive features of this animal are concentrated. Since we have painted the elephant in profile on the previous illustrations, now we will show it full face.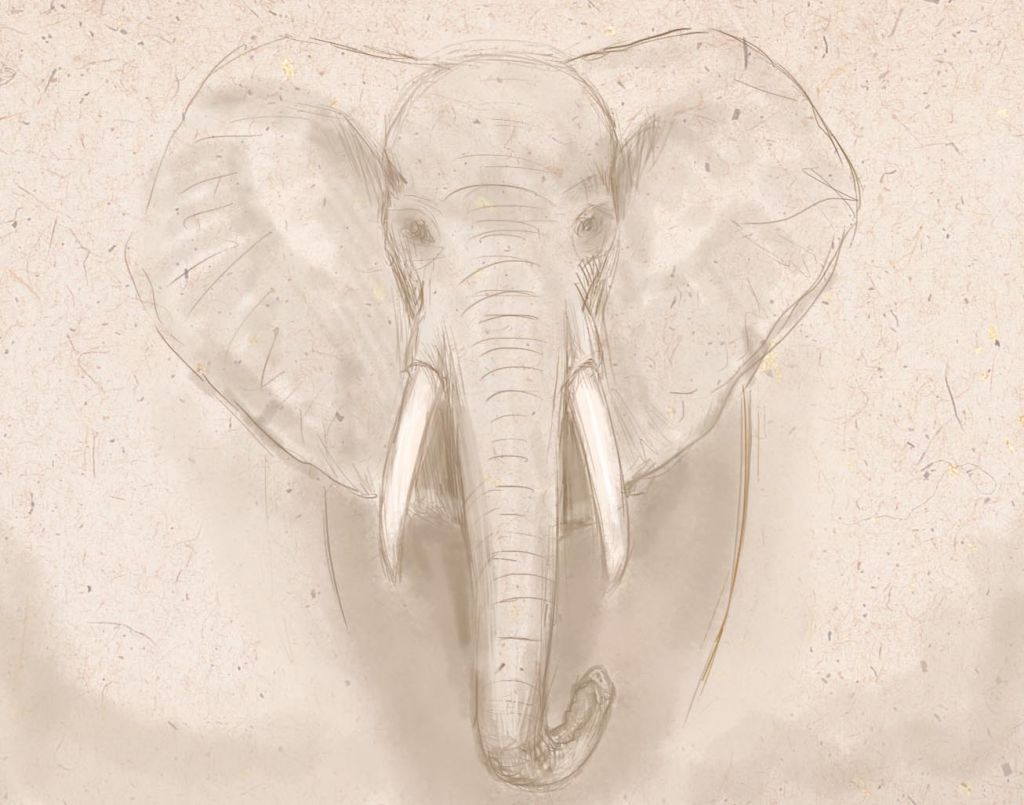
Head
To understand better, let`s look at the schematic image of the head.
The red line shows the shape where the skull can be inscribed; the upper part is a semi-oval and the lower part is slightly narrowed.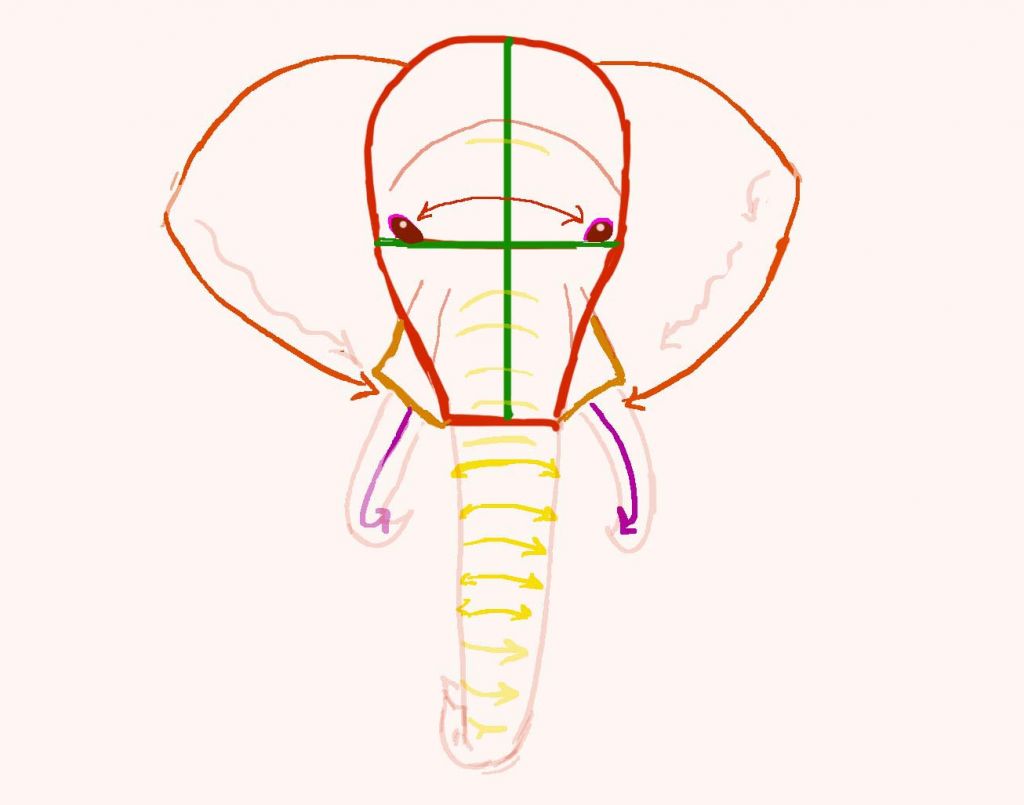
- The red line shows the shape where the skull can be inscribed; the upper part is a semi-oval and the lower part is slightly narrowed.
- The green lines divide the head in half vertically and horizontally, they will help to create a symmetrical picture and locate the eyes properly. Locate the small eyes over the horizontal axis far enough from each other.
- The yellow arrows show the direction and shape of folds on the trunk.
- The pink wavy lines show the uneven surface of the tips of the ears.
- The purple arrows show how the tusks grow.
- The orange triangles mark the skin covering the base of the tusks. However, if an elephant has no tusks, this part of a portrait will be absent.
Ears
Now let`s come over to the next stage of our lesson on how to draw a simple elephant and draw ears. The external ears are very big and serve as a conditioner helping to cool.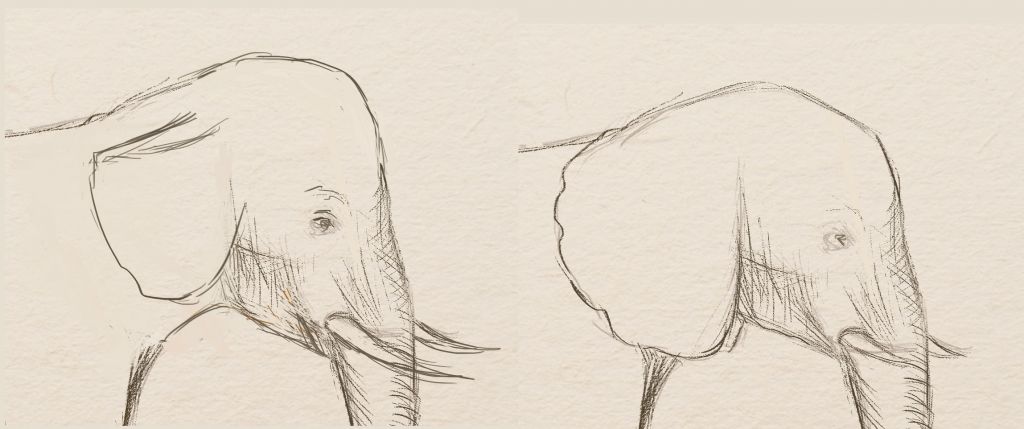
This picture shows the differences between African (right) and Asian (left) elephants. The ears of Indian elephants are much smaller than the African`s and there are differences in the shape of a skull.
Eyes
Now we are coming over to the net stage on how to draw an elephant face. The picture below shows what eye shape these animals usually have. There are many wrinkles of calloused skin around the eyes. There are often eyelashes, they grow straight.
It is very important to locate the eyes properly. They should not overlap the line of a trunk. More often the eyes are located over the base of tusks.
The illustration below shows the features of a skull shape in the area of the eyes.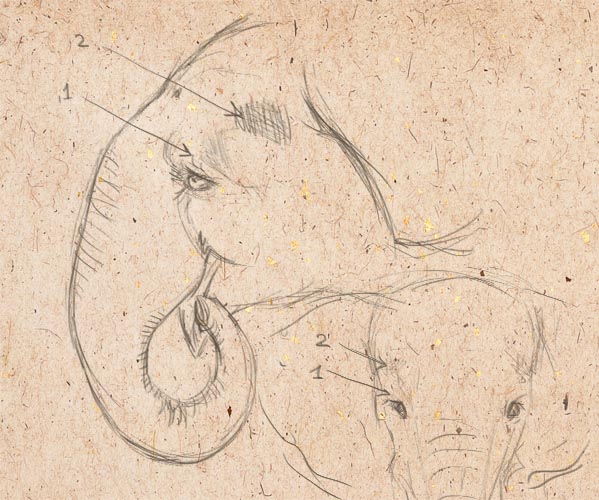
There is a crest over the eyes (1) – the eyebrow ridges and the cavity (2) over the eyebrows.
Show these shapes in your work with light strokes to make it more realistic.
Trunk and Tusks
It is not difficult to depict the trunk, especially if you do not go into details. Still, you should pay attention to the shape and relief of a trunk from the backside.
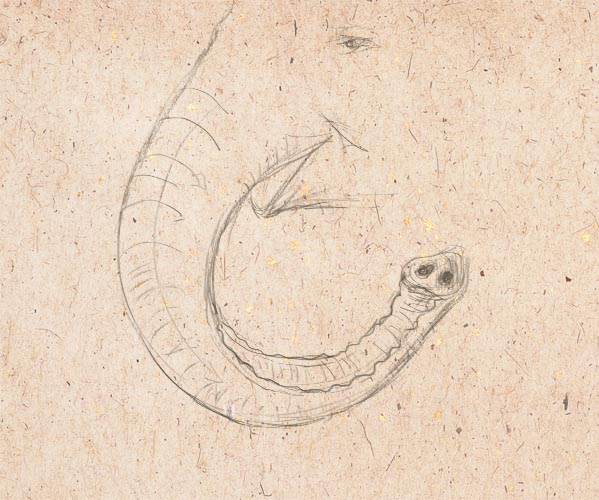
The tip of a trunk has two holes and a round or heart shape.
There is a lower jaw below the trunk. This part of the body has no special features, thus it is not difficult to depict.
The tusks can be of different length and slightly different in shape. Lots of animals have no tusks.
Skin and Folds
Now we are coming over to the last stage of our lesson on how to draw elephants step by step. We should improve our drawing of elephants and add shadow in the lower part of the body, on the belly, under the ears, tail, and lower jaw, under the trunk and tusks.
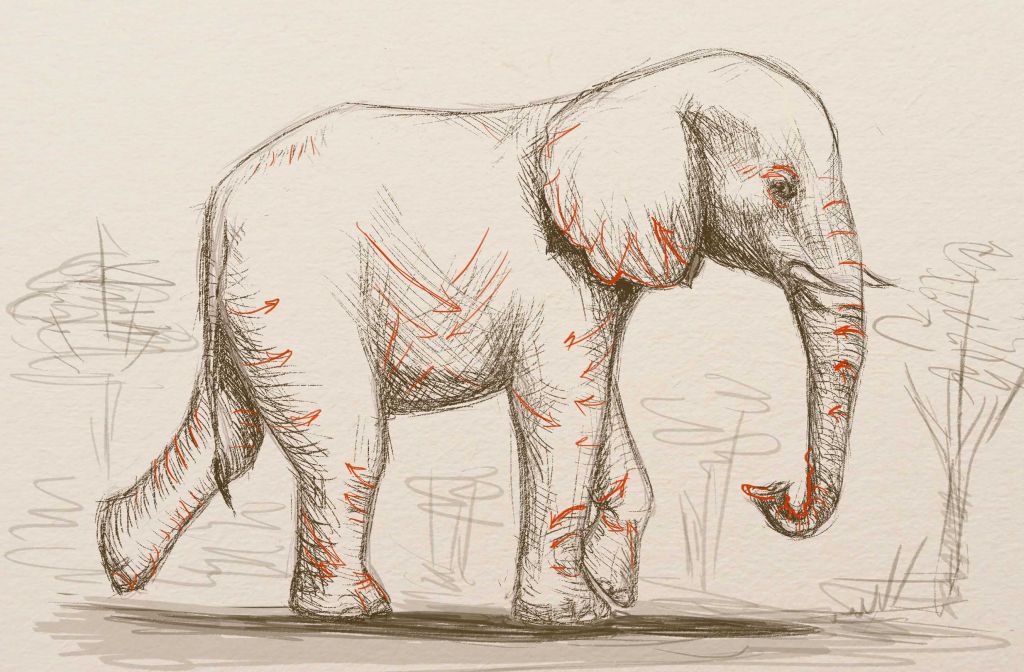 The red arrows on the picture above show the characteristic directions of folds on the skin. The figure will become more volumetric if you add strokes of different intensity, following the shape of the body. The skin will seem more calloused due to the clear strokes that show the deep folds and wrinkles.
Video Tutorial on How to Draw an Elephant Step by Step
To make all the above-mentioned clearer, let`s watch a video on how to draw elephants and paint together.
Beautiful pictures for inspiration
To inspire you, I have prepared several beautiful graphic and coloristic works. You may want to create something like this: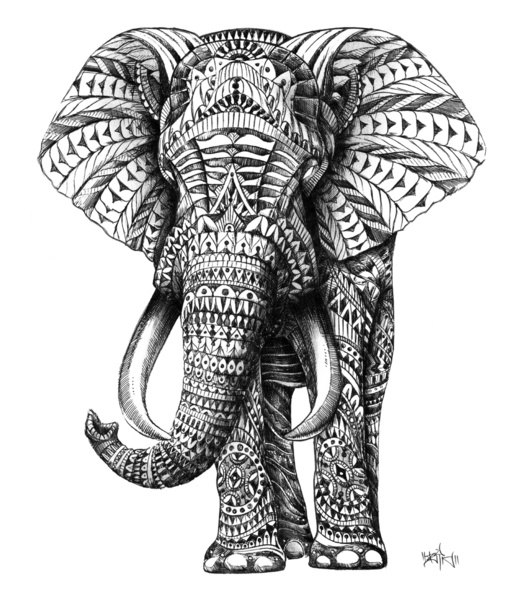


if you have become interested in silhouette painting of animals, you can watch the workshop Creating the silhouette painting with acrylic paints.
Also, I would advise you to look the at unusual works of the modern artist Geoffrey Benzing and, certainly, the works of Salvatore Dali.
I hope you have liked this lesson on how to draw a cute elephant and you will create the perfect drawings and paintings.
I wish you success!
How To Draw An Elephant Face Cartoon
Source: https://artanddrawing.com/drawing/how-to-draw-an-elephant
Posted by: solomonstrel1937.blogspot.com

0 Response to "How To Draw An Elephant Face Cartoon"
Post a Comment